Homework 1: Creating a Landing Page in Hugo #
In this first assignment for our introductory software engineering course, you will develop a valuable, real-world skill: Building a website from scratch using Hugo, a popular open-source static site generator. Though it requires no coding, becoming proficient with Hugo will teach you to quickly familiarize yourself with new tools and technologies through hands-on exploration and experimentation. You will learn how to customize a theme, tweak a template and content, and publish your site for free through GitHub Pages.
To guide your learning, you will create a landing page that describes a product or service of your choosing. This creative ideation process will let you employ AI tools like DALL-E for design inspiration. Iterating based on visual appeal and user stories will introduce you to site validation techniques centered on end-user needs. Overall, this multi-step project aims to showcase the highly collaborative nature of software engineering, while equipping you with a flexible skill for mocking up prototypes and launching sites. By the end, you will have built and deployed a fully-functioning website showcasing your unique product vision.
The intention is that when you build the final project as a team, it will be easy to build a landing page to showcase it, and you will have a good idea of what you want to showcase.
In this assignment you will be using the
hugo-bootstrap-theme (extra credit if you go star ⭐️ his repository, as this is a civic way of showing that we are benefiting from this work), and you can look at the
IntegriMark landing page as an example of a possible final result.
Important Note: You have the opportunity to earn extra credit by keeping a time log of your work. This log should include the time you spend on each part of the assignment, as well as any additional time you spend exploring and experimenting with Hugo. You can submit this log as a separate file in your repository, and it will be used to award extra credit based on the effort you put into the assignment.
Learning Objectives #
- Learn how to work in public, with the scrutinity this may invite.
- Learn to quickly familiarize yourself with new web development tools and technologies through exploration and experimentation.
- Learn to quickly ramp up on unfamiliar codebases and technologies through self-directed research.
- Practice gathering functional requirements and drafting user stories to conceptualize key website features.
- Develop skills in UI/UX design through customizing page layouts, themes, and visual elements.
- Gain experience with modern static site generators and Jamstack technologies
- Learn techniques for validating designs and functional requirements, such as prototyping and iteration.
- Gain practical experience in publishing and hosting static websites on platforms like GitHub Pages.
- Practice communicating technical concepts through writing and illustration.
- Learn how to collaborate through version control and managing shared repository workflows.
Notice on Working in Public #
One of the learning objectives is to work in public. In this course, most of your work will be in public repositories that you visibly contribute to. This will help you build your portfolio, and also help you earn some stats on GitHub, which may come in handy when applying for jobs! 😁
Since the ability to work in a team and on a large codebase, is one of the main skills that employers are looking for, this is a great way to show that you have this skill. It is also a great way to show that you are able to work in public, and that you are able to work with the scrutiny that this may invite:
- Clean commit names following the tips we provide below (you are in the setup where you are the sole contributor to a repo)
- Later in the process, you may accept feedback in the form of pull requests, make sure to review them
- Ensure to a have a good
README.mdfile that explains what the repository is about - Make sure your GitHub profile is configured
Time Estimate, Deadlines and Milestones (13-23 hours) #
This assignment has never yet been done by students, so the time estimates are based on the author’s experience with the tools and technologies involved. The time estimates are based on the assumption that you are completely new on every topic, but if you have some familiarity you may be much faster.
- Part I: Get Started Crafting User Stories (2-4 hours)
- Part II: Configuring Your Environment (1-3 hours)
- Install Visual Studio Code and Extensions (30 minutes to 1 hour)
- Install a Package Manager (15-30 minutes)
- Install and Configure Git (30 minutes to 1 hour)
- Install Hugo (Extended Version) (15-30 minutes)
- Part III: Practice Using Hugo (hugo-kicking-the-tires) (3-5 hours)
- Part IV: Create a Landing Page (hugo-mock-landing-page) (7-12 hours)
- Step 1: Create and Initialize a New Repository, and Copy the Example Site (1-2 hours)
- Step 2: Customize the Landing Page (5-8 hours)
- Step 3: Publish Your Website on GitHub Pages (1-2 hours)
The suggested deadline for this homework is Tuesday Feb 20, 11:59 PM EST. This is a soft deadline. Homework 2 will cover continuous integration using GitHub Actions to show how to deploy this website live, and will be much less work. You can work on Homework 2 concurrently with finalizing Homework 1.
If you believe you need more time on this homework, we recommend you aim to finish Part III by Tuesday Feb 20, 11:59 PM EST and that you submit a partial request for evaluation. You can also create the hugo-mock-landing-page repository with the USER-STORIES.md file to receive feedback on your user stories before tackling Part IV.
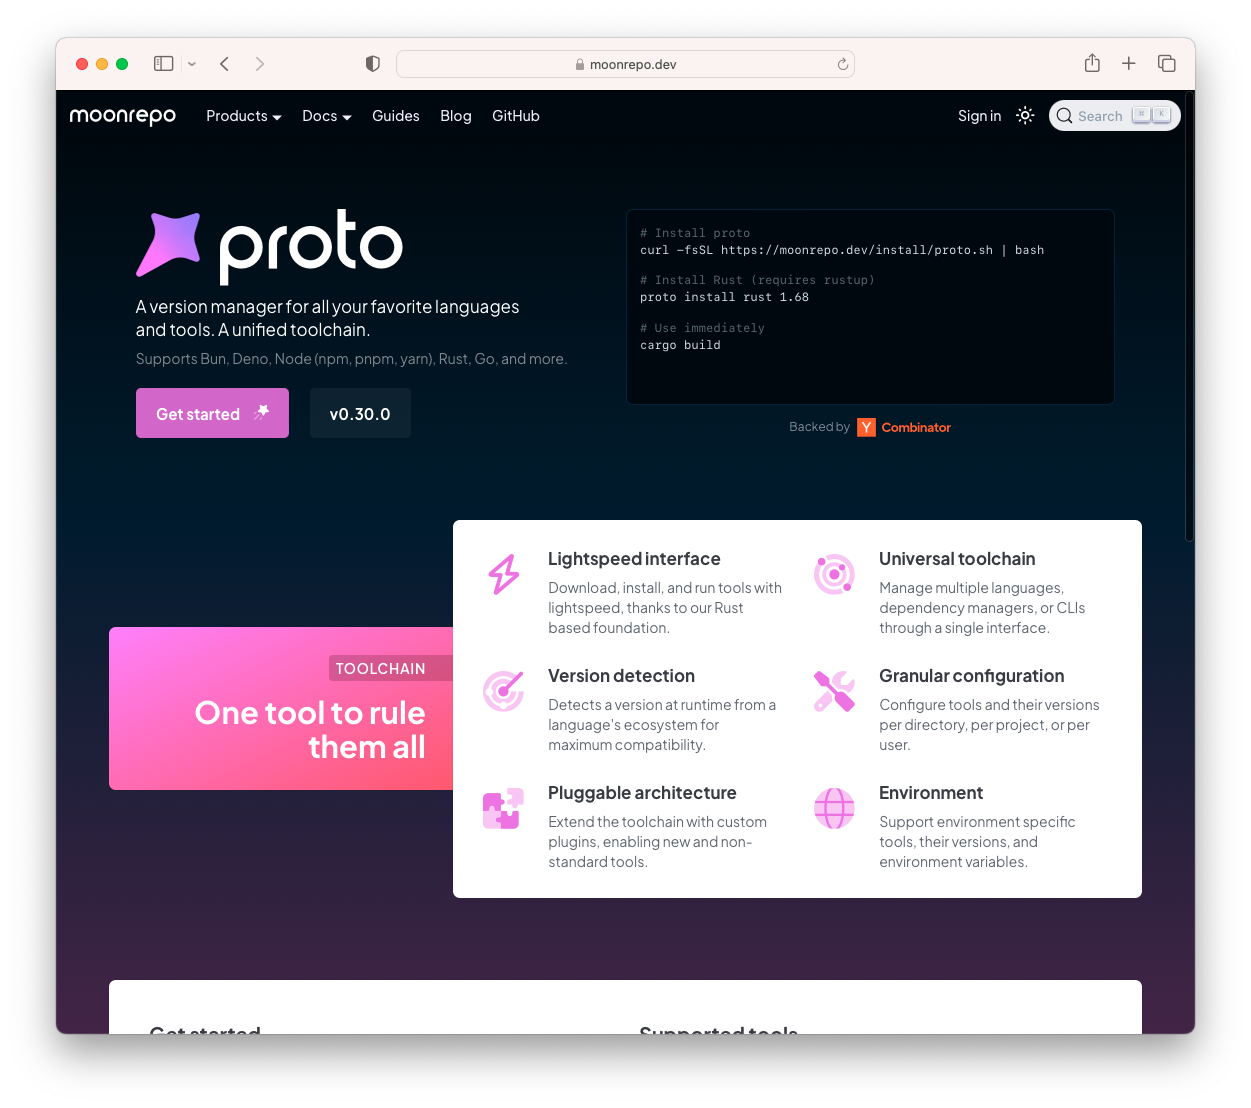
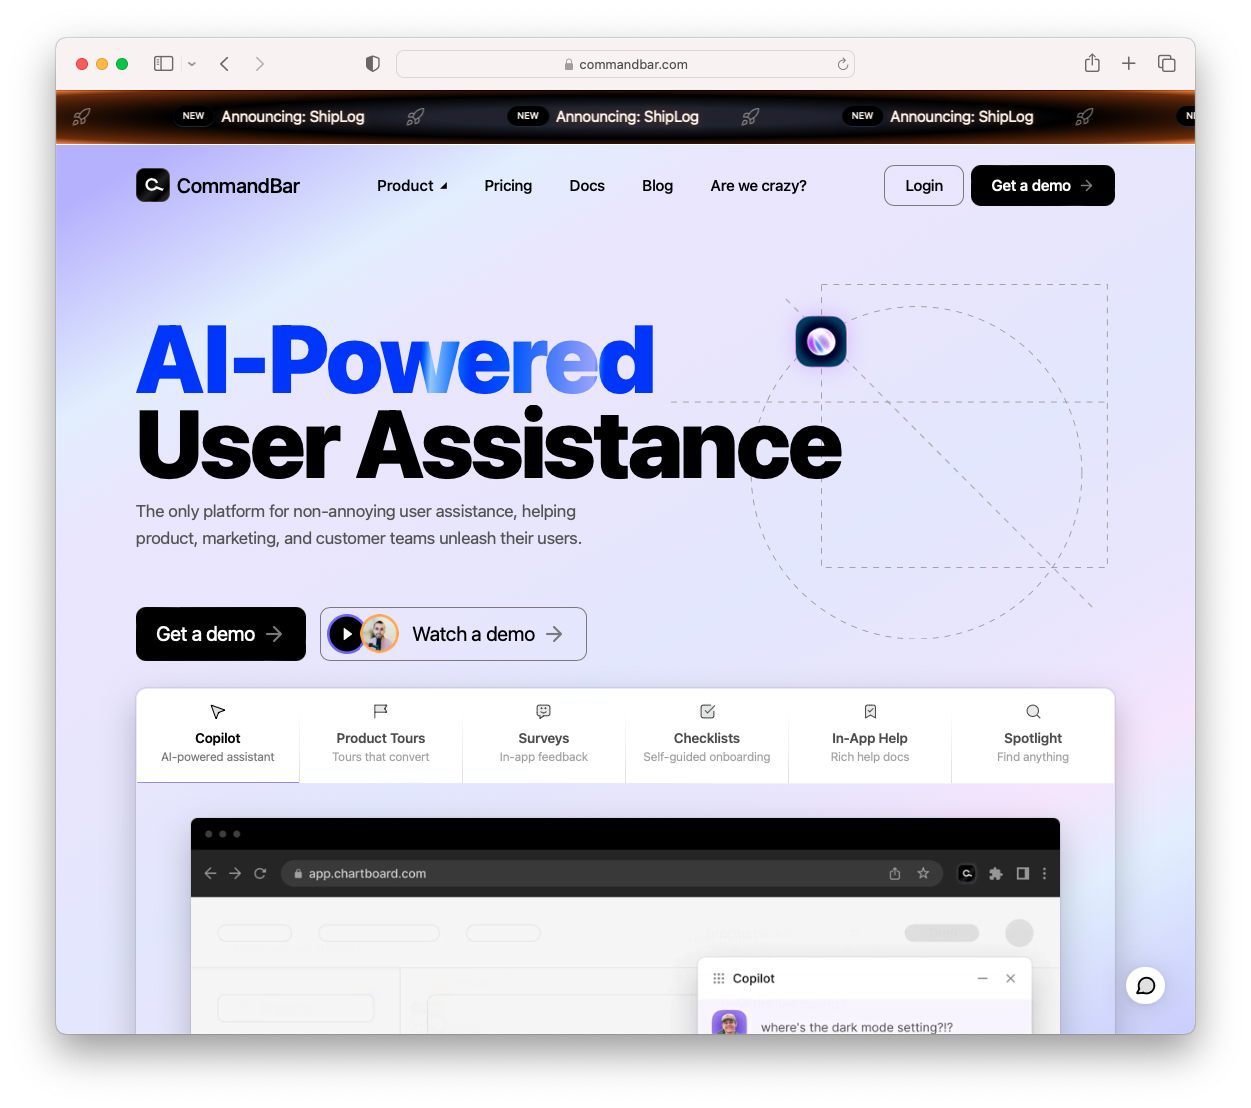
Sample Landing Pages #

Part I: Get Started Crafting User Stories #
This part of the assignment is mostly about ideation, and can run in parallel of Parts 2 and 3, which are more applied.
In this homework, we are creating a landing page for a product of your choice. This product can be made-up, or can be a prototype, or can be an idea that you are thinking about. It can be anything, but it will require that you be inspired enough to write about it for an entire landing page.
- Make a list of 3-4 ideas of products that you might be interested in working on. These can be anything, but they should be things that you are passionate about, or that you think are interesting. This does not have to be related in any way to the final project (especially if it is going to be a group project), but it helps if it is.
- Create 4 columns on a piece of paper or in a table, one column per product idea, and start coming up with 10-15 ideas of features; try to determine which of the 4 products you have most ease in coming up with ideas.
- Select the product your prefer, and now instead of just coming up with rough ideas, shape these into user stories. You can read more about user stories from the Government Services Administration or look at the examples for my product below.
- You will need to “implement” six features when you create the landing page: In Part IV, you will need to create illustrations for 3 features and copy-editing for 6 features (including the 3 for which you will create illustrations). You can use the user stories you come up with to guide you in this process.
Don’t hesitate to use ChatGPT or Claude with this part of the work, but if you use these tools, use them to produce higher quality output. Instead of struggling to come up with 10 ideas, these tools help you come up with 100 ideas, so you can then eliminate 90% and pick the 5-10 best ones. It is your responsibility to ensure the work you present is of high quality, and does not infringe on someone else’s rights.
You do not need to save the other ideas you were working (unless you want to).
However you will need to submit the user stories in a
USER-STORIES.mdfile in the repository for Part IV.
Part II: Configuring Your Environment #
Step 1: Install Visual Studio Code #
Visual Studio Code is a free source code editor developed by Microsoft. It is available for Windows, macOS, and Linux. It has built-in support for JavaScript, TypeScript, and Node.js and has a rich ecosystem of extensions for other languages (such as C++, C#, Python, PHP, Go) and runtimes (such as .NET and Unity).
Install the recommended extensions:
GitHub Copilot (which is free for students) and GitHub Copilot Chat
For Hugo:
For Markdown:
Step 2: Install a Package Manager (optional but recommended) #
Although it is possible to install everything you need in this tutorial by downloading the binaries from a website, it is much easier to use a package manager. A package manager is a tool that automates the process of installing, updating, and removing software. There are many package managers available, and choosing one carefully can save you a lot of time and effort.
The suggested package manager:
- macOS: Homebrew
- Windows: winget
- Linux: Whatever your distribution has (usually
aptoryumorrpm) or Homebrew or snap
For Windows, it is important to install the Windows Subsystem for Linux and a Linux distribution (the default Ubuntu distribution is enough). This will allow you to use the same package manager as macOS and Linux.
Step 3: Install and Configure Git #
Git is a free and open-source distributed version control system designed to handle everything from small to very large projects with speed and efficiency. It is the most widely used modern version control system in the world.
To install Git and configure it Visual Studio Code, follow the instructions in the official documentation.
- macOS:
brew install git - Windows:
winget install --id Git.Git -e --source winget - Linux:
sudo apt install git(on Debian-based distributions)
Step 4: Install Hugo (Extended Version) #
Refer to Hugo’s website for installation instruction for your operating system.
It is possible to download a release directly, but we recommend using the package manager:
- macOS:
brew install hugo - Windows:
winget install Hugo.Hugo.Extended - Linux:
sudo apt install hugo(on Debian-based distributions)
Part III: Practice Using Hugo (hugo-kicking-the-tires)
#
Read Chapter 1, “Kicking the Tires”, of the Build Websites with Hugo Book including the section “Your Turn”, but ignore the instructions in “Installing Hugo”, since we have given other instructions to do so:
- Create a public repository
hugo-kicking-the-tiresin your GitHub account, and ask for aREADME.mdfile to be created:
- Clone the repository to your computer, and go inside the repository folder in Terminal to complete the steps from Chapter 1—the last line opens the folder in VS Code:
git clone https://github.com/<your username>/hugo-kicking-the-tires.git cd hugo-kicking-the-tires code . - Download
the contents of this file and save it as
.gitignorein the root of your repository’s directory. This will prevent you from committing unnecessary files to your repository. - Stage your changes and commit, after every instruction that you follow from Chapter 1 (for instance, commit after doing
hugo new site portfolio, which is the first instruction). - Push your changes whenever you want, but at least after completing the chapter.
- You can explore beyond the “Your Turn” and make additional changes of your own, in which case you should describe what they are.
- Make sure to complete the
README.mdwith a brief description of the repository.
Part IV: Create a Landing Page (hugo-mock-landing-page)
#
In the work of Part III already, and in this Part IV, the work you are invited to do is entirely in public. Both for your own benefit, but also for the benefit of others who might be looking at your code for quality hints, you should learn how to write good commit messages (or if you want to learn more pro tips).
In particular, it helps if you categorize your commits by type, such as:
feat: The new feature you’re adding to a particular applicationfix: A bug fixstyle: Feature and updates related to stylingrefactor: Refactoring a specific section of the codebasetest: Everything related to testingdocs: Everything related to documentationchore: Regular code maintenance.[ You can also use emojis to represent commit types]Here are examples of possible commit messages for individual actions that are suggested in this homework:
Here are some examples of commit messages students could use based on the different tasks outlined in the assignment:
Feat:
- “feat: Add user stories draft file”
- “feat: Add 3 illustrated feature images”
- “feat: Write copy for 6 key product features”
Fix:
- “fix: Remove extra theme config from config file”
- “fix: Adjust image paths after restructuring static assets”
Refactor:
- “refactor: Restructure repo to integrate theme as submodule”
- “refactor: Consolidate config files into main project dir”
Style:
- “style: Update logo and brand colors”
- “style: Customize page layout and styling”
Docs:
- “docs: Add installation and setup instructions to README”
- “docs: Document process for publishing to GitHub Pages”
Chore:
- “chore: Initialize new Hugo site”
- “chore: Remove unused pages and content”
- “chore: Configure gitignore rules”
Step 1: Create and Initialize a New Repository, and Copy the Example Site #
Create a new public repository
hugo-mock-landing-pagein your GitHub account, and ask for aREADME.mdfile to be created.Clone the repository to your computer, and go inside the repository folder in Terminal to complete the steps from Chapter 1—the last line opens the folder in VS Code:
git clone https://github.com/<your username>/hugo-mock-landing-page.git
cd hugo-mock-landing-page
code .
Download the contents of this file and save it as
.gitignorein the root of your repository’s directory. This will prevent you from committing unnecessary files to your repository.In the same Terminal, you are going to add the
hugo-bootstrap-themeby Felipe Carneiro as a git submodule, and then copy the example site into your main repository:mkdir themes cd themes git submodule add https://github.com/filipecarneiro/hugo-bootstrap-theme cd .. git commit -m "Added `hugo-bootstrap-theme` as a submodule" cp -r themes/hugo-bootstrap-theme/exampleSite/* . git add . git commit -m "Copied the example site into the main repository"You then have to make some adjustments:
cp config/_default/config.toml . rm -Rf config cp -pr assets/images static/ rm -Rf assets/imagesImportant: You have to edit the
config.tomlfiles to remove the line:themesdir = "../.."At this point, when you run
hugo serverfrom the root of your repository, you should see the example site running athttp://localhost:1313/hugo-bootstrap-theme/(note that if you multiple processes going, the port might not be1313, but instead some much larger; you can get the actual port from the output of thehugo servercommand).Make sure to commit and push the contents of your repository to GitHub.
Step 2: Customize the Landing Page #
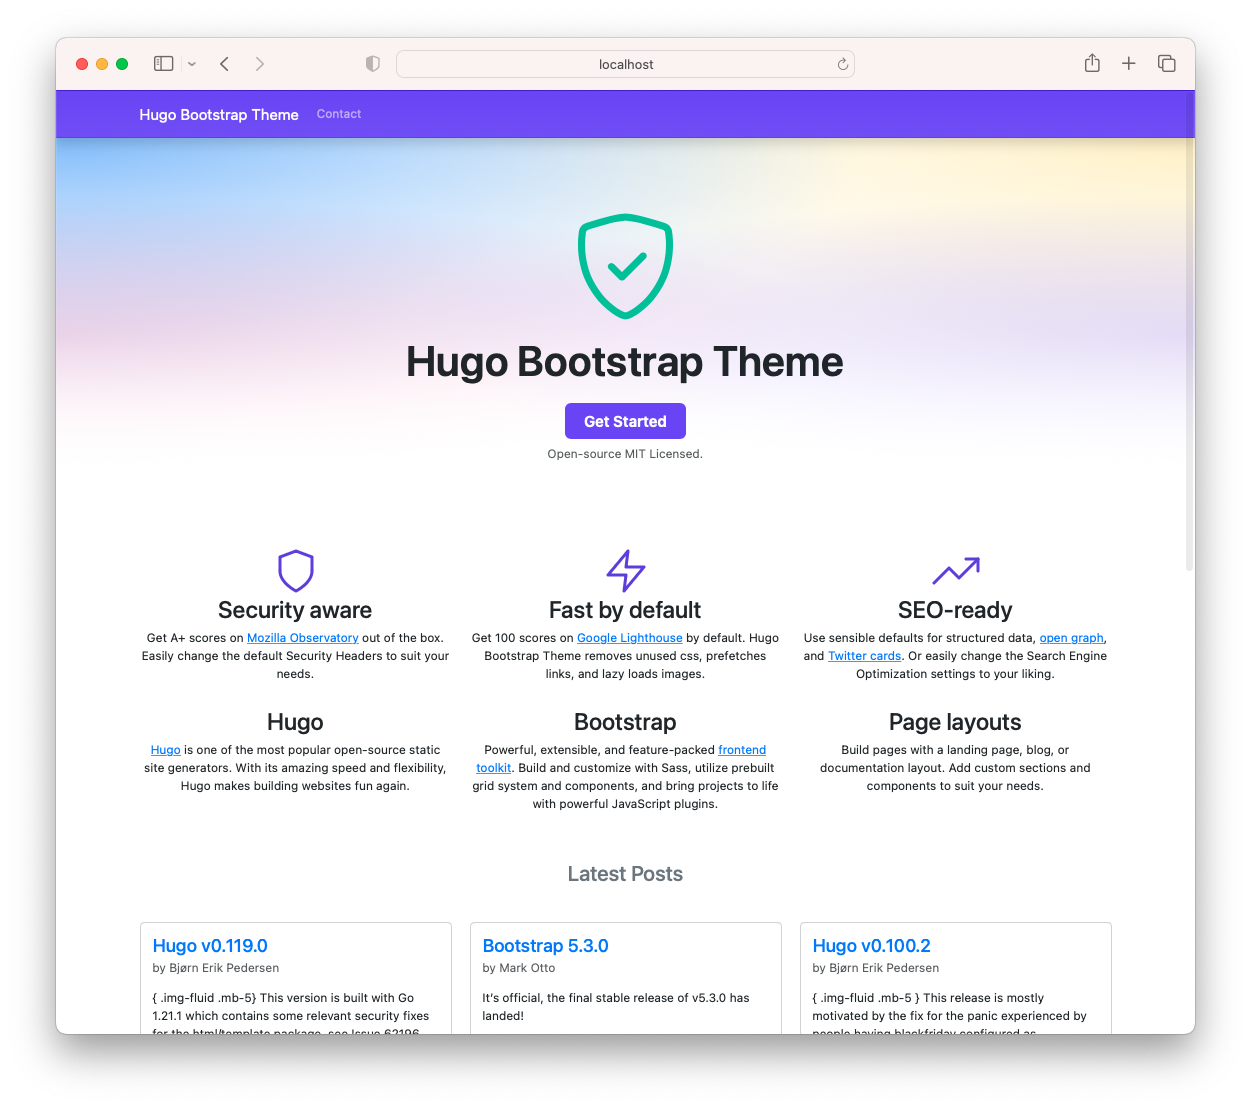
In the previous step, you copied the example site of the hugo-bootstrap-theme into your repository. Now, you are going to customize it to create a landing page for a product of your choice. You can use the following steps as a guide:
Create user stories file in repository. Add a file
USER-STORIES.mdto your repository that contains the user stories you were working in Part I:- You need to have at least 15-20 user stories, and they need to fulfill the INVEST criteria. (You can use ChatGPT or Claude to help verify whether your backlog fulfills these criteria.)
- You can learn more about the Markdown language by looking at cheatsheets like
Datacamp’s or
@im-luka’s. - Here is
an example of the
USER-STORIES.mdfile for the IntegriMark project.
Choose six features for the landing page. You need to select 6 of these user stories to write up as features in the landing page; ideally these should be salient features that might be attractive to an audience.
Choose the three you will illustrate. Of these 6, you need to select 3 to illustrate with images—you can illustrate these any way you want, such as: Using your own skills, clip-arts on Internet, or DALL-E/MidJourney or other generative AI. You will evaluate based on visual appeal, so it is important to take this aspect seriously!
Run
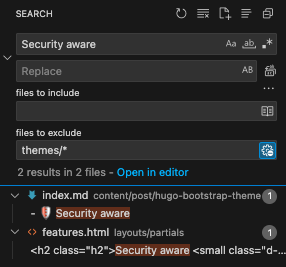
hugo serverand observe changes live. You can runhugo serverfrom the root of your repository, then look at text in the browser and look through the code base on how to fing it. You can use VS Code’s Search Across Files and exclude thethemes/*subdirectory.For instance, to determine where to modify the features’ copy-editing, you can search for “Security Aware” as you can see in the above screenshot that it is the first feature that is advertised on the landing page.
Ensure the landing page is fully customized. Make sure the title, logo, contact information, feature images and descriptions, and other content are fully customized to your product.
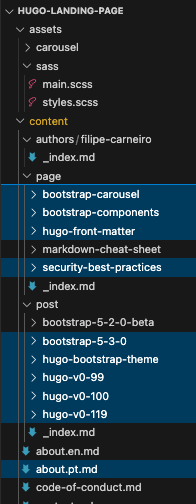
Remove unnecessary content
Don’t hesitate to remove unnecessary content from the repository as soon as possible, to visual clear your output and workspace. For instance, you can remove all but one
posts, and all but onepagesof which you will set thedraftstatustruein the front matter. In this way, you can keep a sample post, to have a reference of all that can be done in the metadata, but this won’t be visible to visitors. (This is not strictly necessary as you can always generate new pages and posts from the archetypes using thehugo newcommand, but this is convenient.)--- title: "Markdown Cheat Sheet Ⓜ️⬇️" description: "An overview of basic markdown syntax." draft: true tags: ["Featured"] images: ["markdown-guide-og.jpg"] keywords: [ "markdown cheat sheet", "markdown", "cheat sheet", "markdown cheatsheet", "hugo markdown cheat sheet", "goldmark", ] aliases: - blog/my-third-blog-post ---These are the files I removed when I created the IntegriMark landing page:

Step 3: Publish Your Website on GitHub Pages #
So far all the work you have done has been local, but now you are going to publish your website on GitHub Pages. This is a free service that allows you to host a static website directly from a GitHub repository.
Edit
config.tomlto adjust the following lines:author = "<your name>" baseURL = 'https://<your GitHub username>.github.io/hugo-mock-landing-page/' copyright = "<your name>" title = "<your product name>"You can deploy the static output of Hugo to the branch
gh-pagesof your repository, by downloading the following file as the scriptpublish_to_gh_pages.sh, placing at the top of your repository, and running it in this way:# first time, need to first set it as executable chmod +x publish_to_gh_pages.sh # generate hugo build hugo # then can be run ./publish_to_gh-pages.sh public <your GitHub username>/hugo-mock-landing-pageMake sure your repository is properly configured to use
gh-pagesas the publishing source.
What To Submit #
Using the Google Forms (NOTE: SUBMISSION LINK TO BE PROVIDED, MAY END UP BEING ON GRADESCOPE), you can submit:
- your GitHub username
- the URL of your
hugo-kicking-the-tiresrepository - the URL of your
hugo-mock-landing-pagerepository - the URL of your published website
- the URL of your
USER-STORIES.mdfile in thehugo-mock-landing-pagerepository - (optional, extra credit) the URL of your Google Spreadsheet based on the time log template
Troubleshooting #
This section is under construction.
How to debug Hugo websites #
When repeatedly refreshing websites, there are several steps involved (each of which can fail):
- the Hugo website can fail to build to a static HTML bundle;
- the static HTML bundle can fail to be committed to the branch
gh-pagescorrectly; - the branch
gh-pagescan fail to be deployed properly to the GitHub Pages website; - once deployed, the website can be cached on the user browser and be accessing old resources.
Even when using hugo server, there can be some failure involve in the intermediate steps even if they happen behind the scenes. (Usually simply restarting hugo server addresses theses issues.)
Examine the output of hugo to diagnose problems
#
For these reasons, it is sometimes useful to just be able to examine the entire structure of the Hugo website.
To do so, we generate the website simply by typing hugo, this will generate (or update) the folder public (in fact, it is probably better to remove it, rm -Rf public, before doing hugo, to ensure there aren’t files left-over from a previous version of the website).
This allows you to:
- examine the file structure to ensure, for instance, that certain pages are generated (if pages you are expecting are not being generated, this could indicate a template is not being found);
- check the content of files to ensure that the URLs are constructed the proper way, and that assets are referenced using the right paths.
Check the GitHub Actions deployment panel #
If the generation of the website is not the problem, then the issue could be at the other points of failure:
You can check whether the issue is at step 2 (committing the website to the
gh-branch), by examing the branch and checking to make sure it is identical to the files generated by the commandhugo, if not, the compilation needs to be rerun;You can check whether the issue is at step 3 (deploying the
gh-branchto GitHub Pages), by going to the “Actions” tab of your respository, you should see the “ pages build and deployment” workflow: It could either be in progress (orange), completed (green) or failed (red). If the job is failed, you can rerun the workflow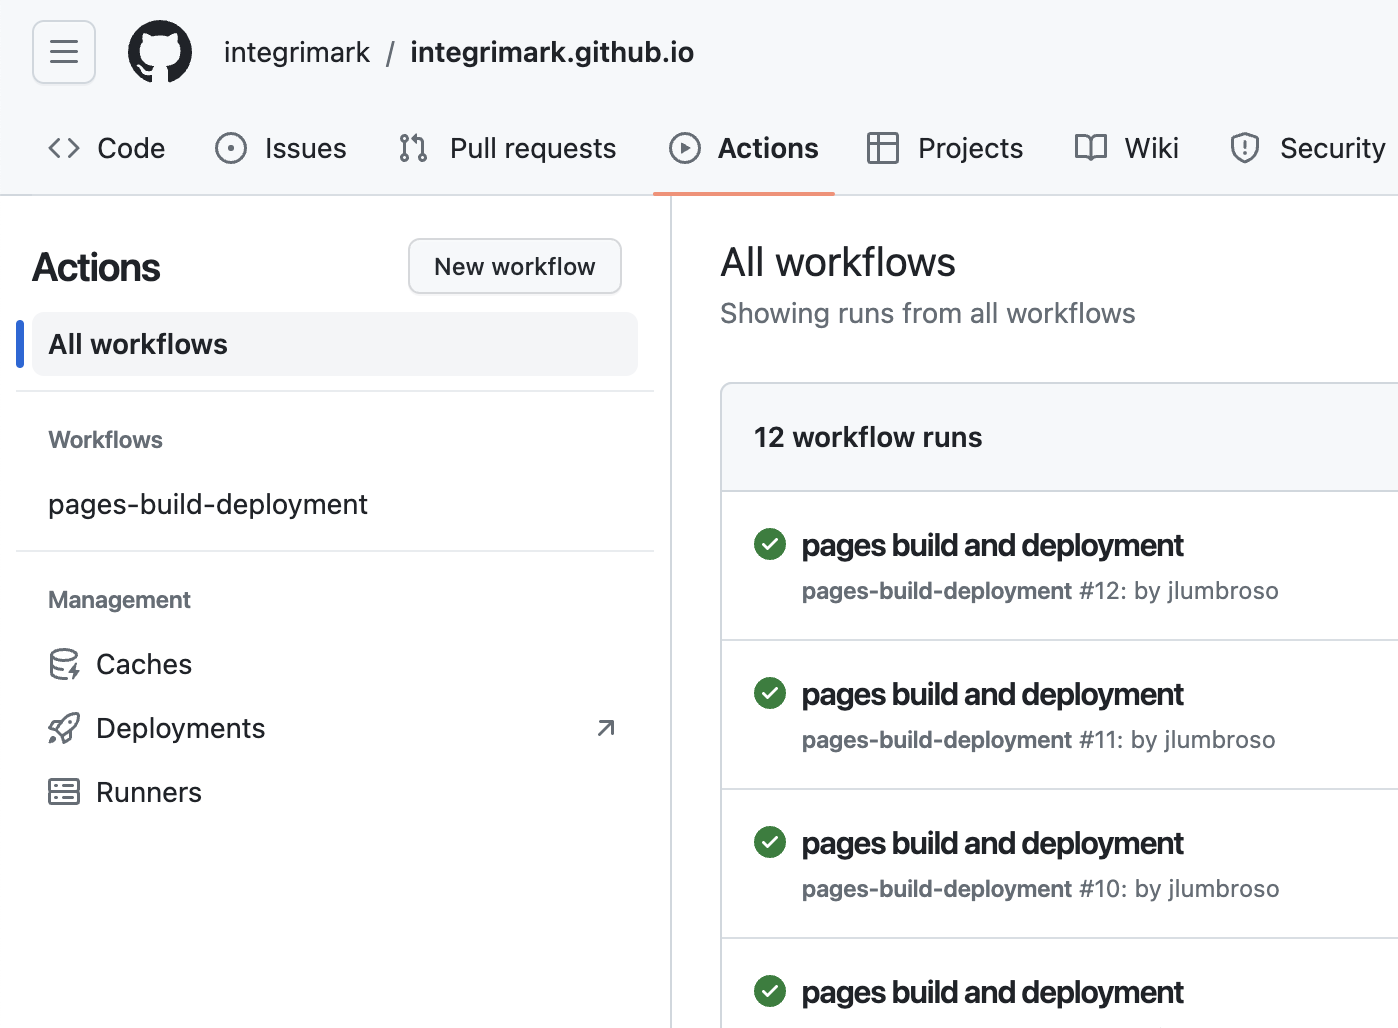
You can check whether the issue is at step 4 (cache interference from your browser) by using a command-line based tool to fetch your page and examining it in VS Code. For instance, we recommend installing
wget, which you can do:# on macOS with Homebrew brew install wget # on Linux or Windows with Windows Subsystem for Linux sudo apt-get install wgetthen, you can call the
wgetcommand to retrieve a page of your website:$ wget https://integrimark.github.io/ --2024-03-13 09:59:04-- https://integrimark.github.io/ Resolving integrimark.github.io (integrimark.github.io)... 2606:50c0:8001::153, 2606:50c0:8002::153, 2606:50c0:8003::153, ... Connecting to integrimark.github.io (integrimark.github.io)|2606:50c0:8001::153|:443... connected. HTTP request sent, awaiting response... 200 OK Length: 10173 (9.9K) [text/html] Saving to: ‘index.html’ index.html 100%[===================>] 9.93K --.-KB/s in 0.003s 2024-03-13 09:59:04 (2.94 MB/s) - ‘index.html’ saved [10173/10173]This has saved the file
index.htmlas it currently exists on the server, and it can be examined to determine what it actually contains at this point in time. If the content is not what is expected, it means that one of the previous steps failed.
#
If your assets (images, stylesheets) seem missing #
This is probably a URL problem, with baseURL.
If you encounter a problem about fatal: Fetched in submodule path
#
This is an issue with a commit on the submodule repository having been deleted for some reason. The submodule needs to be reinitialized.
To update the submodule to point to the most recent commit, you can follow these steps:
Open a terminal or command prompt and navigate to the root directory of your repository.
Run the following command to initialize and update the submodule:
git submodule update --init --remoteThis command will fetch the latest changes from the remote repository of the submodule and update it to the most recent commit.
If the above command doesn’t work due to the dangling commit, you can try removing the submodule and adding it back. First, remove the submodule:
git submodule deinit themes/hugo-bootstrap-theme
git rm themes/hugo-bootstrap-theme
Then, add the submodule back, pointing to the desired branch or commit:
git submodule add <repository-url> themes/hugo-bootstrap-themeReplace
<repository-url>with the URL of the submodule repository.Commit the changes to your main repository:
git add .
git commit -m "Update submodule to the latest commit"
Push the changes to your remote repository:
git push
After following these steps, the submodule should be updated to the most recent commit, and the dangling commit issue should be resolved.